Tuesday, December 4, 2012

Hot Cocoa For the Soul


I didn't think it would happen...but it did.  The desire for a warm drink and wool socks does come upon you in Southern California.  We moved to Los Angeles in the middle of a heat wave this past summer, which didn't end until the first part of November!  Quite a contrast after leaving the four seasons of Minnesota. Now the Christmas lights adorn the palm trees and ever so slight chill is in the air.

While it was still warm here, Amanda from Delighted Magazine asked me to contribute a hot cocoa recipe with a "twist"for Delighted's Winter issue.  If you haven't discovered this GORGEOUS on-line magazine yet, you should click over there and to see which one she picked for the magazine. Beautiful photography, special features, gift and recipe ideas.  Each issue more lovely than the next! Wholeheartedly,  I went to work on some recipe ideas and these are a few my taste tester husband and kids thought made the cut.  Now we are ready for cocoa!  Something to keep you warm this winter and serve to guests this Christmas season.


Hot Coconut Cocoa

Hot Coconut Cocoa

Creamy coconut milk gives this hot cocoa a luxurious texture.  Not too sweet with lovely hint of coconut that pairs so well with chocolate.  Since this warm frothy drink doesn't scream coconut, all of your guests will love it especially those who need a dairy-free alternative.

1 15 oz can of coconut milk
4 oz.Bitter sweet chocolate 
4 oz. Milk chocolate 
2 Tbsp. Cocoa powder
1/3. c. boiling water

pinch of salt
tsp. vanilla

Whisk cocoa into  1/3 c. boiling water. In a saucepan combine coconut milk and pinch of salt.  Simmer. Add the cocoa mixture and chocolate chips whisk to combine and chocolate melts. Stir in vanilla. 

Garnish with whipped cream and chocolate shavings.


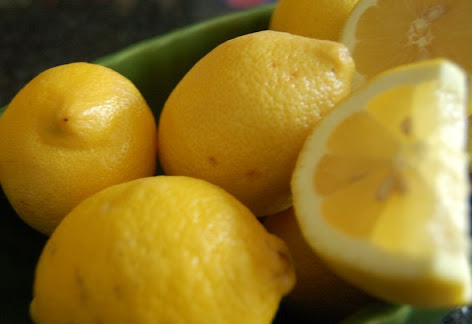
Hot Lemon  Cream Cocoa

Lemon Cream Hot Cocoa

Citrus is wonderful perk of the cold winter.  Hot cocoa is a prize at the end of winter outdoor activities.  Who would ever dream that pairing them together would be a delicious option.  After having a taste of an unlikely Lemon Chocolate Tart, and dreaming of more, this hot cocoa was born.  The best chocolate you can find topped with a lemon cream.

Hot Cocoa
1 1/2 c. whole milk
1 c. half and half
4 oz. Bittersweet chocolate chopped
4 oz. Milk chocolate chopped
2 Tbsp. Cocoa powder
1/3 c. boiling water
1 tsp. vanilla

Whisk cocoa into  1/3 c. boiling water. In a saucepan heat the milk and half and half, smoked salt and smoked paprika to just below simmering.  Add the chocolate pieces, whisk together until melted.  Add vanilla.

Lemon Cream

2 large eggs
1 large egg yolk
1/2 c. granulated sugar
1/2 c. freshly squeezed lemon juice
2 Tbsp. cold unsalted butter cut into pieces
pinch of salt

1/2 c. heavy cream

Whisk together eggs, egg yolk, sugar and lemon juice.  Cook over medium heat stirring constantly until the lemon curd has thickened and it coats the back of the spoon.  Remove from heat add a pinch of salt and whisk in the butter pieces.

Let cool completely.  Whip the cream and fold into the curd.

*Shortcut: You can use a purchased lemon curd and fold in freshly whipped cream.
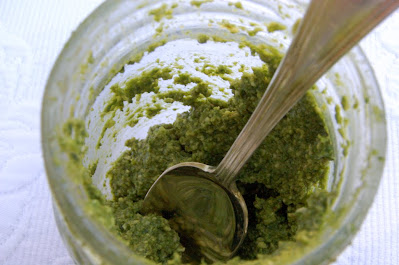


Smoked Hot Cocoa

Smoked Hot Cocoa

My secret weapon in cooking lately has been smoked salt and smoked paprika.  Both seasonings can be very subtle in everything from soups to guacamole, leaving people wondering, what the interesting undertone is.  With this hot cocoa recipe I'm not going too crazy because by now many people have added cayenne to their chocolaty drinks.  The addition of smoked salt and paprika kick up the already wonderful chocolate flavor. 

1 1/2 c. whole milk
1 c. half and half
4 oz. Bittersweet chocolate chopped
4 oz. Milk chocolate chopped
2 Tbsp. Cocoa powder
1/3 c. boiling water

1/8 tsp Smoked Salt (or more to taste)
1/4 tsp Smoked Paprika

1 tsp. Vanilla

Whisk cocoa into  1/3 c. boiling water. In a saucepan heat the milk and half and half, smoked salt and smoked paprika to just below simmering.  Add the chocolate pieces, whisk together until melted.  Add vanilla.

Serve with lightly sweetened whipped cream and a sprinkling of smoked paprika.

Monday, October 29, 2012

Secret Sauce

Years ago my friend Barb from my dinner club had a wonderful dinner at a steak house.  She raved about the flavor combination of a dish she had featuring a tangy and slightly sweet sauce paired with blue cheese and caramelized onions.  The challenge was on.  Now how to recreate something I'd never tasted, only to rely on her mouth watering description to recreate it.  Here is what I came up with and it's been passed on by word of mouth to many people since that time.  It's now time to write it down.


Tri-tip with Raspberry Balsamic Sauce, Caramelized Onions and Gorgonzolla
 
1 8oz bottle of Balsamic Vinegar
1/2 c.  Seedless Raspberry Jam (Fruit Spread)
Freshly ground black pepper Worcestershire Sauce
2 Tbsp. Butter

 In a large, heavy-bottomed saucepan, combine the balsamic vinegar and seedless raspberry spread, a few grinds of fresh pepper and a couple shakes of Worcestershire.  Whisk to combine, and place over medium-high heat. Bring the mixture to a boil, and lower heat,continue to cook – it will bubble aggressively, and you should stir regularly to keep it from scorching. For about 10-15 minutes, you will be reducing the mixture by about one half. It will thicken slightly. If the mixture gets too thick go ahead and add a bit of water to thin it out a bit.  Just before serving add the butter to the sauce to give it a gloss and added richness.


While the sauce is reducing, slice two large onions and caramelize slowly until soft and golden brown


We love a tri-tip roast, but if you can't find one in your area, ask your butcher, or a sirloin would work just fine.  We like to cook it to medium rare, let the meat rest before slicing. This cut of meat is so easy to prepare.  Just liberally salt with kosher salt and lots of grinds of fresh pepper.  Sear on high heat on the grill and then finish off on the upper level of the grill.  If you don't have a grill or it's the middle of winter, it's fine to brown on the stove top and finish in the oven.    

Saturday, October 27, 2012

The Color Orange

There's nothing dramatic about this recipe, well maybe it's bold orange color.  What is dramatic is the flavor.  This is a soup, ok I'll say it, sounds cliche, but it's a "go to" recipe when I have a dinner party.  Excuse me if it's been served to you more than once at my table.  I like to serve it in small little bowls  after appetizers and before the meal.  It helps me settle in to getting everything else prepped and on the table.  Isn't that the hardest part of a dinner party, actually getting the food served all warm and ready at the same time!

The technique and the ingredient list is simple.  All you need is a one pound bag of carrots, a couple of onions (garlic too if you like) some cumin seeds (ground if that's what you have) olive oil and chicken broth (vegetable if you lean that way)


Roasted Carrot (or Pumpkin) Cumin soup

1 pound of carrots peeled and cut in half (depending on size of carrots)
2 onions quartered
a sprinkling of kosher salt
freshly ground pepper
2 Tbsp of olive oil

4 c. chicken broth (one box)

2 tsp. crushed toasted cumin seeds or ground cumin

Garnish:
Smoked (nitrate free) bacon cooked crisp for garnish (I bake it on that same pan in the oven...no mess)

Creme fraiche or some heavy cream for the tiniest of touch.  If you use cream you could be artistic with a swirl.


Preheat your roasting tray in a 425 degree oven. (the one pictured used to be my jelly roll pan...now it's strictly a "roasting" pan. ) Roast them for about 25 min. until they are tender and browning.

When they are tender put the carrots and onions in a stock pot with the chicken broth and the cumin.  Let the pot simmer (for about 30 -45 min) Use an immersion blender or a food processor to puree the soup. Add more liquid for desired consistency.

Meanwhile, put a few tsp. of cumin seeds into a skillet and warm over medium heat until fragrant.  You'll want to watch them closely so they don't burn. Use a spice grinder or a mortar and pestle to crush the seeds...it smells wonderful.

Everyone asks "What is this" they know it's an orange vegetable, but can't place it.  So, on that note I decided to make it for my first Los Angeles Food Blogger event showcasing Pumpkin recipes. Couldn't decide on a Pumpkin idea, so I made this recipe but substitute Sugar Pie Pumpkin and roasted it in the same manner. It was good, but I think I prefer the carrot version.  If you make this with pumpkin you need to add a spoon of raw honey because carrots are naturally sweeter than pumpkin.


The color orange is a favorite of mine, you can check it out on Pinterest. http://pinterest.com/crazy4kale/orange/  or the many recipes to try on my food idea board: http://pinterest.com/crazy4kale/


Monday, September 24, 2012

Don't Be a Hater

I have this sandwich I can't get out of my mind.  The combination is unique and once you've tasted it, it's a thing dreams are made of, well at least for me.  The sandwich starts with the glorious beet.  Deep and rich in color and loaded with flavor.  Ok, I've heard what the "haters" say.."beets taste like dirt", but I dare you to try this sandwich and not become a lover.

Start by roasting a bunch of beets.  Save the greens...I'll explain later.

Roasted Beets


Preheat oven to 425 degrees. (if you are baking something else you can put them in at any temp, you'll just have to keep them in longer if it's a lower temp.

Scrub beets to remove excess dirt.  Cut off the greens. (Save, don't discard!! So many good nutrients and totally versatile.  Saute, and use as any other dark leafy green)  For example, this Beet Green Frittata 

Get a piece of foil large enough to make a foil pouch for the number of beets you have.  Drizzle with olive oil and kosher salt and pepper.  Here is a "how to" beet roasting pictorial for you visual learners.


Beet tartine

Got cha.  This looks good right?  Well, it's not exactly the sandwich I'm talking about, but it's a variation on a theme.  I'll get to the sandwich part in a minute.

For the Beet Tartine pictured above.  You simply take some lovely crusty bread, brush it with olive oil and grill, or toast it in the oven.  Next smear some goat cheese, slice some of the beets you've just roasted and drizzle with a chimichurri sauce : just whirl up some Italian parsley, cilantro, olive oil, red wine vinegar, garlic, crushed red pepper, salt, pepper and some cumin.  Viola!

Think of this Beet Tartine as the warm up act for the headliner.


Now to the Roasted Beet Sandwich.  Lemon Zest is the not so secret ingredient.  This is one even beet haters like.  It takes the roasted beet and takes it to the moon.

I'll start with the players of the starring act.

Roasted Beet and Arugula Sandwich

Here's what you'll need:

1 container of creme fraiche
1 lemon (for the zest) well maybe a bit of the juice if you want more lemon taste.
Fresh Thyme (a bit) also to taste, but give it a good amount.

A handful of fresh arugula
Arugula pesto

Sliced roasted beets
Crusty bread


Assemby:
1. Two slices rustic wonderful bread
2.  Mix creme fraiche with lots of lemon zest and fresh thyme leaves
3.  Spread some of the lemony creme fraiche on one side of bread
4.  Spread a layer of Arugula Pesto on the other
5.  Place sliced beets and a handful of fresh arugula
6.  Drizzle some olive oil and a few grinds of freshly cracked pepper and kosher salt on the greens

Put together and enjoy.  You might just dream about this combination too.  Truly, I have served this sandwich to people who really didn't think they liked beets and they were just trying to be polite.  They left wanting to know how to make it themselves.

Sunday, September 9, 2012

PIE!

What does this bright shiny piece of glass (it's really an ashtray...but that's not PC) have to do with pie?  A lot I tell you, but it might take me a while to tie it into my story.  

This is one of my husband's prized possessions.  It is a piece of his past.  One of those familiar things that sits in your parent's house for years while you're growing up. Somehow when you find yourself all grown up, that's the one thing you want even though there is no seeming value to anyone. Actually his brother knew how much he loved it and gave it to him as a gift.  It's is one of the things we hand carried and didn't  trust to the moving truck.


My version of the crystal ash tray is this oblong green Haegar bowl.  I got it years ago at "Hot Sam's" Antiques in Lakeville, MN who's motto is "Everything from the priceless, to the tasteless".  To me it is priceless. I paid all of five dollars for it.  

Naturally, any place we call home, would have to at least have these two keepsakes anchoring our home.  Los Angeles is now our home and this bowl of juicy nectarines helped me to get one step closer to feeling part of the community.


When we left Minneapolis, my lovely food blogging friends threw me a wonderful party hosted by my friend Amanda of Healthy Life, Happy Cook aka @sweetnsnazzy. Picture a turn of the century brownstone with a storybook worthy back courtyard. Beautiful flowers and tables set up filled with watermelon mojitos, smoked pork tacos and every fixing imaginable, topped off by Key lime tarts, plum upside down cake and designer cupcakes.  These women are some of the most creative and warm people I've ever met.

I swear, I'm getting to the pie part.  If the party wasn't enough, the ladies gave me a cookbook, "Joy the Baker Cookbook - 100 Simple and Comforting Recipes"  written by  one of my all time favorite food bloggers Joy Wilson of Joy the Baker !! Here it comes...last week, I found out a local LA radio station KCRW sponsors a PIE contest and Joy was one of the judges!  Bingo. This was a sign...a way for me to start to feel more at home here in LA, and maybe, just maybe I could meet Joy.  I don't want this to sound creepy, I'm not a stalker!  I listen toJoy and her best friend Tracy of Shutterbean.com on their podcast called "Homefries".every week. The podcast fills us in on their crazy antics and life philosophies.  I love it.  It reminds me to find the humor in life's day to day experiences, and not take things (or myself) so seriously. Reminding us all It's good for your health to giggle and enjoy the ride!

So,  I entered on the very last day they were taking contestants.  Now, what kind of pie to make?  My family's favorite is this one, Fresh Blueberry Pie, but I couldn't find good blueberries at the market.  These nectarines were juicy good, so I improvised and made the same recipe using nectarines, but added a little interest with some added basil (for fun).


It turned out pretty well.  The only hitch was this pie is best when it's chilled and the contest is held outdoors of course, so that made for a sad, yet pretty pie.


The venue. The LA County Art Museum Super cool place for a pie contest don't you think?  We gained free admission buy wearing aprons that day.


Turns out this is a really big deal.  Lots of pie. Lots of happy people.


A couple of my favorite people showed up!

Pies after the twelve celebrity judges had their fill. 

  Last, but not least.  I met her!  Let me tell you Joy is the same delightful person (in person) as she is on her blog and podcast.  I won the contest just by having the opportunity to meet her. 


"Home is where the pie is"...or something like that.

Friday, August 24, 2012

Seasons


Come on in!  Welcome to one of my "happy places".  Thanks to my friends Jill and Kristin the last two summer seasons I've been able to escape to this oasis of no cares and worries and enter down this road to Jill's wonderful garden where she allowed me to "weed for food" and also get free "talk therapy" on my knees in the dirt.


Here is the beautiful scene on the other side of the driveway with a view of the serene Minnesota countryside. The sky is bluer than blue and the butterflies flutter and kiss the petals of the brightly colored zinnias.  Here in this slice of heaven I found comfort the months after losing my mom and also as I made the mental preparations to leave our home in Minnesota to make a home in California.


These wonderful friends have been tending and nurturing this garden for a few years and were kind enough to let me get close to the growing process.  They grow oodles of my favorite kale and chard and all the rest was just icing on the cake.  This cherry tree was heavy laden with sour pie cherries just begging to be picked!  In the Fall there are pears that make the sweetest sauce spiked with vanilla bean.


Take a breath and picture the blue, blue sky and the vision of looking straight up in the tree and seeing these cherries bursting from the tree.  Breath it in, can you see it?


When our weeding (and talking) is done we make a harvest for the day.  We are hot, sweaty and covered in dirt, but our reward is a healthy pile of vegetables.  Not pictured are the raspberries I would pick from the bush and eat directly on my "break" and the old beaten up used yogurt container filled with the most gorgeous bunch of flowers you'd usually find at the most trendy flower shop. I felt blessed every time.


Now comes a true confession.  Before this moment, I had never made my own pie crust from scratch.  I know, I know, pie crust is easy you say.  I had a fear ok?  I had rid my fear of yeast by mastering "Artisan Bread in Five Minutes a Day" . It was high time to make my own pastry crust.  Plus my daughter, Maria (the midnight baker), demanded I get over it.


Look!  I did it!  It wasn't hard at all.  I watched my mom making pie crust by cutting in the fat with two knives...I tried that, only to get a tough crust.  This time a treated myself to a new tool, a pastry blender.  That did the trick.  The crust was flaky and my son said it was awesome.  My critics have spoken. I will never buy another refrigerated pie crust again.


There are more pie crust recipes out there to make your head spin.  They are all basically the same.  But there's the  question of the kind of fat to use, and the choice of cold water or even adding a Tbsp. or two of vodka.  I opted for this basic recipe but I used half butter and half Crisco.

Cherry pie
(Found in my mom's recipe box)
Make a pie crust.  Your own favorite or the recipe above.  Preheat oven to 425 degrees

1c. sugar
3 Tbsp. corn starch
1/4 tsp. salt
5 c. pitted cherries (sour or sweet)
1 tsp. lemon juice
1/2 tsp. vanilla (sometimes she used almond extract)
2 Tbsp. unsalted butter cut into cubes
1 Tbsp. milk

A cherry pitter works well if you have one, but if you have help and some time you can pit them with a paring knife.

Whisk together sugar, corn starch and salt.  Stir in cherries, lemon juice and vanilla. Pour the cherry mixture into a dough lined pie plate.  Make strips of dough to top in a lattice pattern.  Remember it doesn't have to be perfect...this is art.  Your own creation.

Place pie on a baking sheet (in case it runs over, and it will)  Bake at 425 degrees for 15 minutes.  Reduce temperature to 375 degrees and bake until and the filling is bubbling.  About and hour or so.


My heart has always been in both Minnesota and California.  We are now well into our new adventure of living in Los Angeles.  This is a new "season" of our lives.  I welcome the year round growing season and new crops.  If you know me well, you'll know that next to kale my other favorite ingredient,  lemons!  Pictured are the wonderful meyer lemons in my in-laws backyard!!  Once again I am blessed. We will deeply miss seeing our loved ones in the Midwest regularly, but do have the gift of having all of our children in one place (at least for now) Parents and friends that feel like family here too.  Stay tuned for our culinary adventures on the West Coast.


Friday, May 4, 2012

Starting (again) with chocolate.

I've missed blogging. Not going to make any excuses, I just want to say a warm hello.  We've still been eating, of course,  just not photographing our eats.  It's like I've taken a long winter's nap and as the earth is warming and bursting to grow and change so am I.  I'm so excited to use some of these ideas I've been collecting over the past months.  Today I'm simply going to start with a sweet treat that is a standard in our house for birthdays. Got to start somewhere.  This recipe is tried and true, always moist and rich.  It's our family's Chocolate cake with chocolate butter cream frosting. You can jazz it up with raspberries, or it's lovely with a coating of chopped toasted almonds pressed into the fudgey frosting.  Like I said it's our standard recipe, but in my awakening even though I know this recipe is great...this week I was inspired to think way outside the box and try my new friend and local Twin Cities blogger Sarah's recipe.  She writes "The Vanilla Bean Blog" This blog is beautiful in every way. The point of her blog is about heritage.  Her goal is to create a family history in food. She takes recipes from her past and makes them new again. She  creates a legacy for her little ones.  I LOVE this!  Ok...here's an example, Sarah took her favorite chocolate cake recipe and brought it to a whole new level!  How about something savory paired with the sweet butter cream?  She created a chocolate cake with BASIL butter cream frosting.  Here's the link to her lovely blog and inventive creation.  http://www.thevanillabeanblog.com/2012/05/chocolate-cake-with-basil-frosting.html

Since there is nothing wrong with tradition, below is my "Make it, make it, make it" version...still good if you don't want to rock the boat. Friends have asked for the recipe, so it's my pleasure to share:


Kelli's (Formerly Helen's) Chocolate Cake 
(Our family friend Helen has passed, so I'm going to claim it now)

1 3/4 c. granulated sugar
1/2 c. cocoa
2 c. flour (I use unbleached AP flour)
1/2 tsp. salt
1 Tbsp. baking soda

2/3 c. vegetable oil
1 c. buttermilk
1 egg
1 tsp. vanilla (I use a bit more...can't hurt)
1 c. boiling water

Mix all dry ingredients together.  Make a well in the center of the dry ingredients.  Add oil, buttermilk, egg and vanilla.  Mis until well combined (medium speed on mixer)  Slowly add boiling water.  Batter will be quite thin.

Pour into prepared 8 inch round pans or one 9x13.  Bake at 350 degrees until center springs back or toothpick comes out clean.

Chocolate Butter Cream Frosting

2 (1 oz.) squares of unsweetened dchocolate
2 oz. semisweet chocolate chips (here again I dump in a few more)  Love Guittard chocolate chips
1 c. butter softened
4 c. powdered sugar
1/4 c. milk or cream
2 tsp. vanilla

Place chocolate in top of double boiler, bring water to a boil.  Reduce heat to low cook until chocolate melts, stirring often.  Remove from heat.

Beat butter at medium speed with an electric mixer until creamy.  Add chocolate, powdered sugar and remaining ingredients; beat until spreading consistency.

This makes a lot of frosting.  Cut in half for one cake of make it all, it freezes well.


So my lesson is start...just start.  Bake a cake from scratch.  You won't be sorry and you'll start your own traditions, but never be afraid to think outside the box.
Related Posts with Thumbnails